Seal each shingle to the liner and overlapping shingle with a 3 inch wide bead of plastic roofing cement.
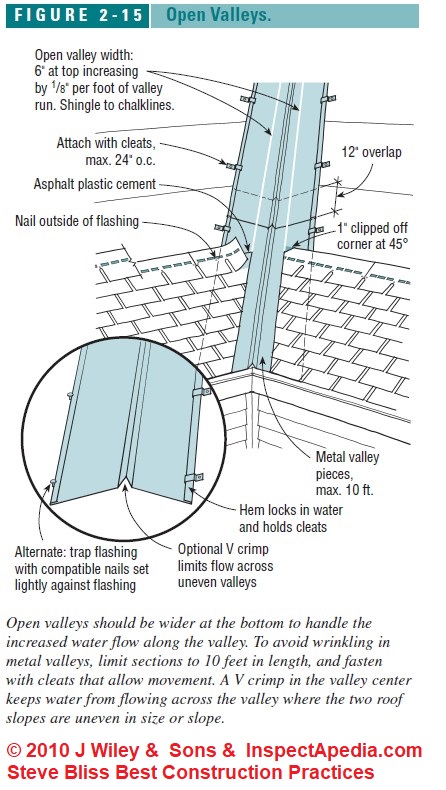
Roof valley flashing overlap.
Shingles should overlap the valley lining by at least 6 inches.
Laps should comply with the following criteria.
Properly sized and installed valley flashing is key to channeling water safely off the roof.
Remember to caulk the underside of the flashing with a sealant.
An overlap must run over not under.
First apply asphalt plastic cement under the overlap area then place and nail down the second piece of flashing.
Cut the top layer of shingles along the chalkline.
Step 6 install the flashing.
Extend entire width of flashing completely to the bottom of the roof valley.
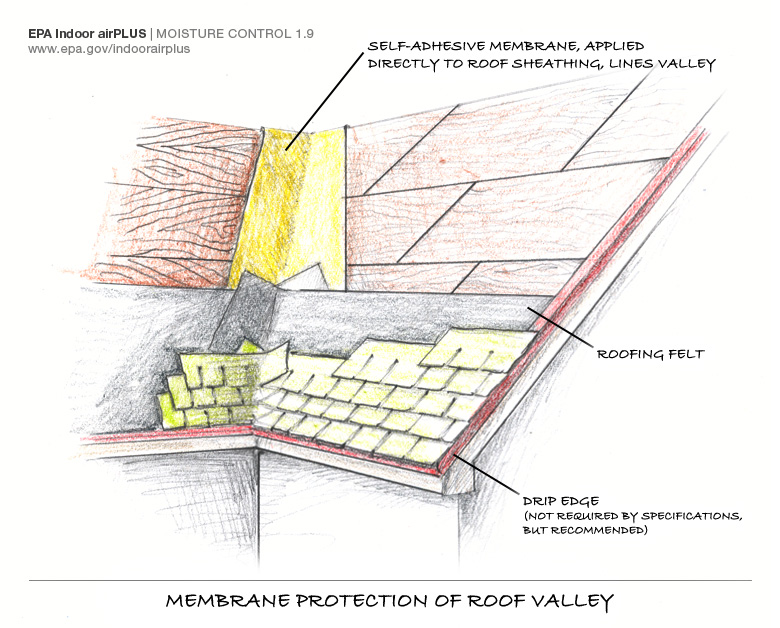
Valley flashing is metal or sometimes peel and stick material that protects an important area on the roof where two slopes come together to form a valley.
Cut bottom of flashing so the entire width of the valley flashing extends approximately 1 2 to 3 4 over the fascia trim board along eaves the following photos illustrate removal and replacement of a closed cut valley with new open metal valley.
A lap is the part of a flashing that covers or overlaps any part of the similarly shaped component and these can be described as an end lap overlap or underlap.
With a roll roofing valley keep the nails at least 6 inches from the valley centerline.
Step 9 cut corners and apply cement.
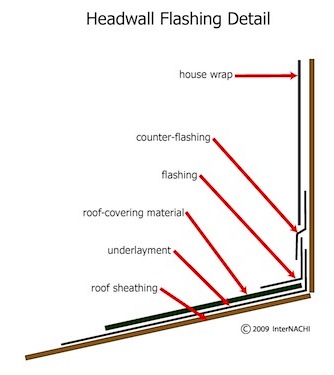
Flashing against a vertical sidewall shall be by the step flashing method.
Overlap each piece of flashing by at least 6 inches 150 mm.
Moving up the valley install any additional roof flashing as required to cover the entire length.
Now nail this first flashing at both its far ends.
With a metal liner nail 1 2 inch outside the liner.
To splice the pieces add roofing cement to the lower piece and install the upper piece with at least a six inch overlap.
Slip a piece of sheet metal flashing under the top layer of shingles to protect the bottom layer in the valley while you cut the shingles with a hook blade.
At the end of the vertical sidewall the step flashing shall be turned out in a manner that directs water away from the wall and onto the roof and or gutter.
Fold the top of the flashing over the ridge and nail it off every ten inches or so along the outer edge of the flashing now this valley will carry water off the roof and away from the house.
The flashing shall be a minimum of 4 inches 102 mm high and 4 inches 102 mm wide.